Mississippi Land Bank (MLB)
Website Handover Guide
Welcome to your new Mississippi Land Bank website on Webflow!
This guide is designed to help you manage, update, and maintain your website with ease. It includes essential information specific to your site, with step-by-step instructions and direct links to in-depth tutorials from Webflow’s resources.
Introduction to Webflow
1. Logging into Webflow
To get started, log in to Webflow at webflow.com with your provided credentials. Once logged in, select the “Mississippi Land Bank” project from your dashboard.
2. Navigating the Webflow Editor
The Webflow Editor is where you’ll manage content on your site. You can add or edit text, update images, and manage dynamic content like blog posts or team member profiles.
Key areas in the Webflow Editor:
• Pages: View and edit different pages of your website.
• Collections: Manage dynamic content like blog posts, team members, and loan services.
• Settings: Access SEO settings, Open Graph settings, and form submission data.
Helpful Tutorial: Introduction to the Webflow Editor - Start with this video to familiarize yourself with the editor.
3. Updating Content
Text and Images:
• To edit text, simply click on the text you want to update in the Webflow Editor, make your changes, and press “Save.”
• To change an image, click on the image you want to update, upload a new one from your computer, and save the changes.
Collections (Dynamic Content):
Your website includes several dynamic content types that are stored in Collections:
• News: For new announcements or articles.
• Location Details: To update location specific information or add new ones.
• Board of Directors and Employees: Update bios, photos, or add new team members.
• Counties: To update counties served or add new ones.
• Quarterly and Financial Reports: To update financial reports information or add new ones.
To update these, go to the Collections panel in the Editor, select the appropriate collection, and click “New Item” to add or click an existing item to edit.
CMS Collections (e.g., News, Employees, Location Details...):

You can add or update listings directly in the Collections section as described earlier.
For any structural changes, like adding new fields, it’s recommended to consult with Michael from FetchCreates.
Helpful Tutorial: Webflow CMS Basics - This article will guide you through managing collections.
4. Managing Forms and Submissions

Your site includes Contact Form and Mortgage Department form. To view submissions:
• Go to Project Settings > Forms to see all submissions.
• You can also set up email notifications to receive form submissions directly.
Note: The contact form may be connected to a third-party app using an API which will redirect the form submissions from the Webflow to an outside database.
Helpful Tutorial: Managing Form Submissions in Webflow - This article covers form management and notifications.
5. SEO and Meta Tag Updates
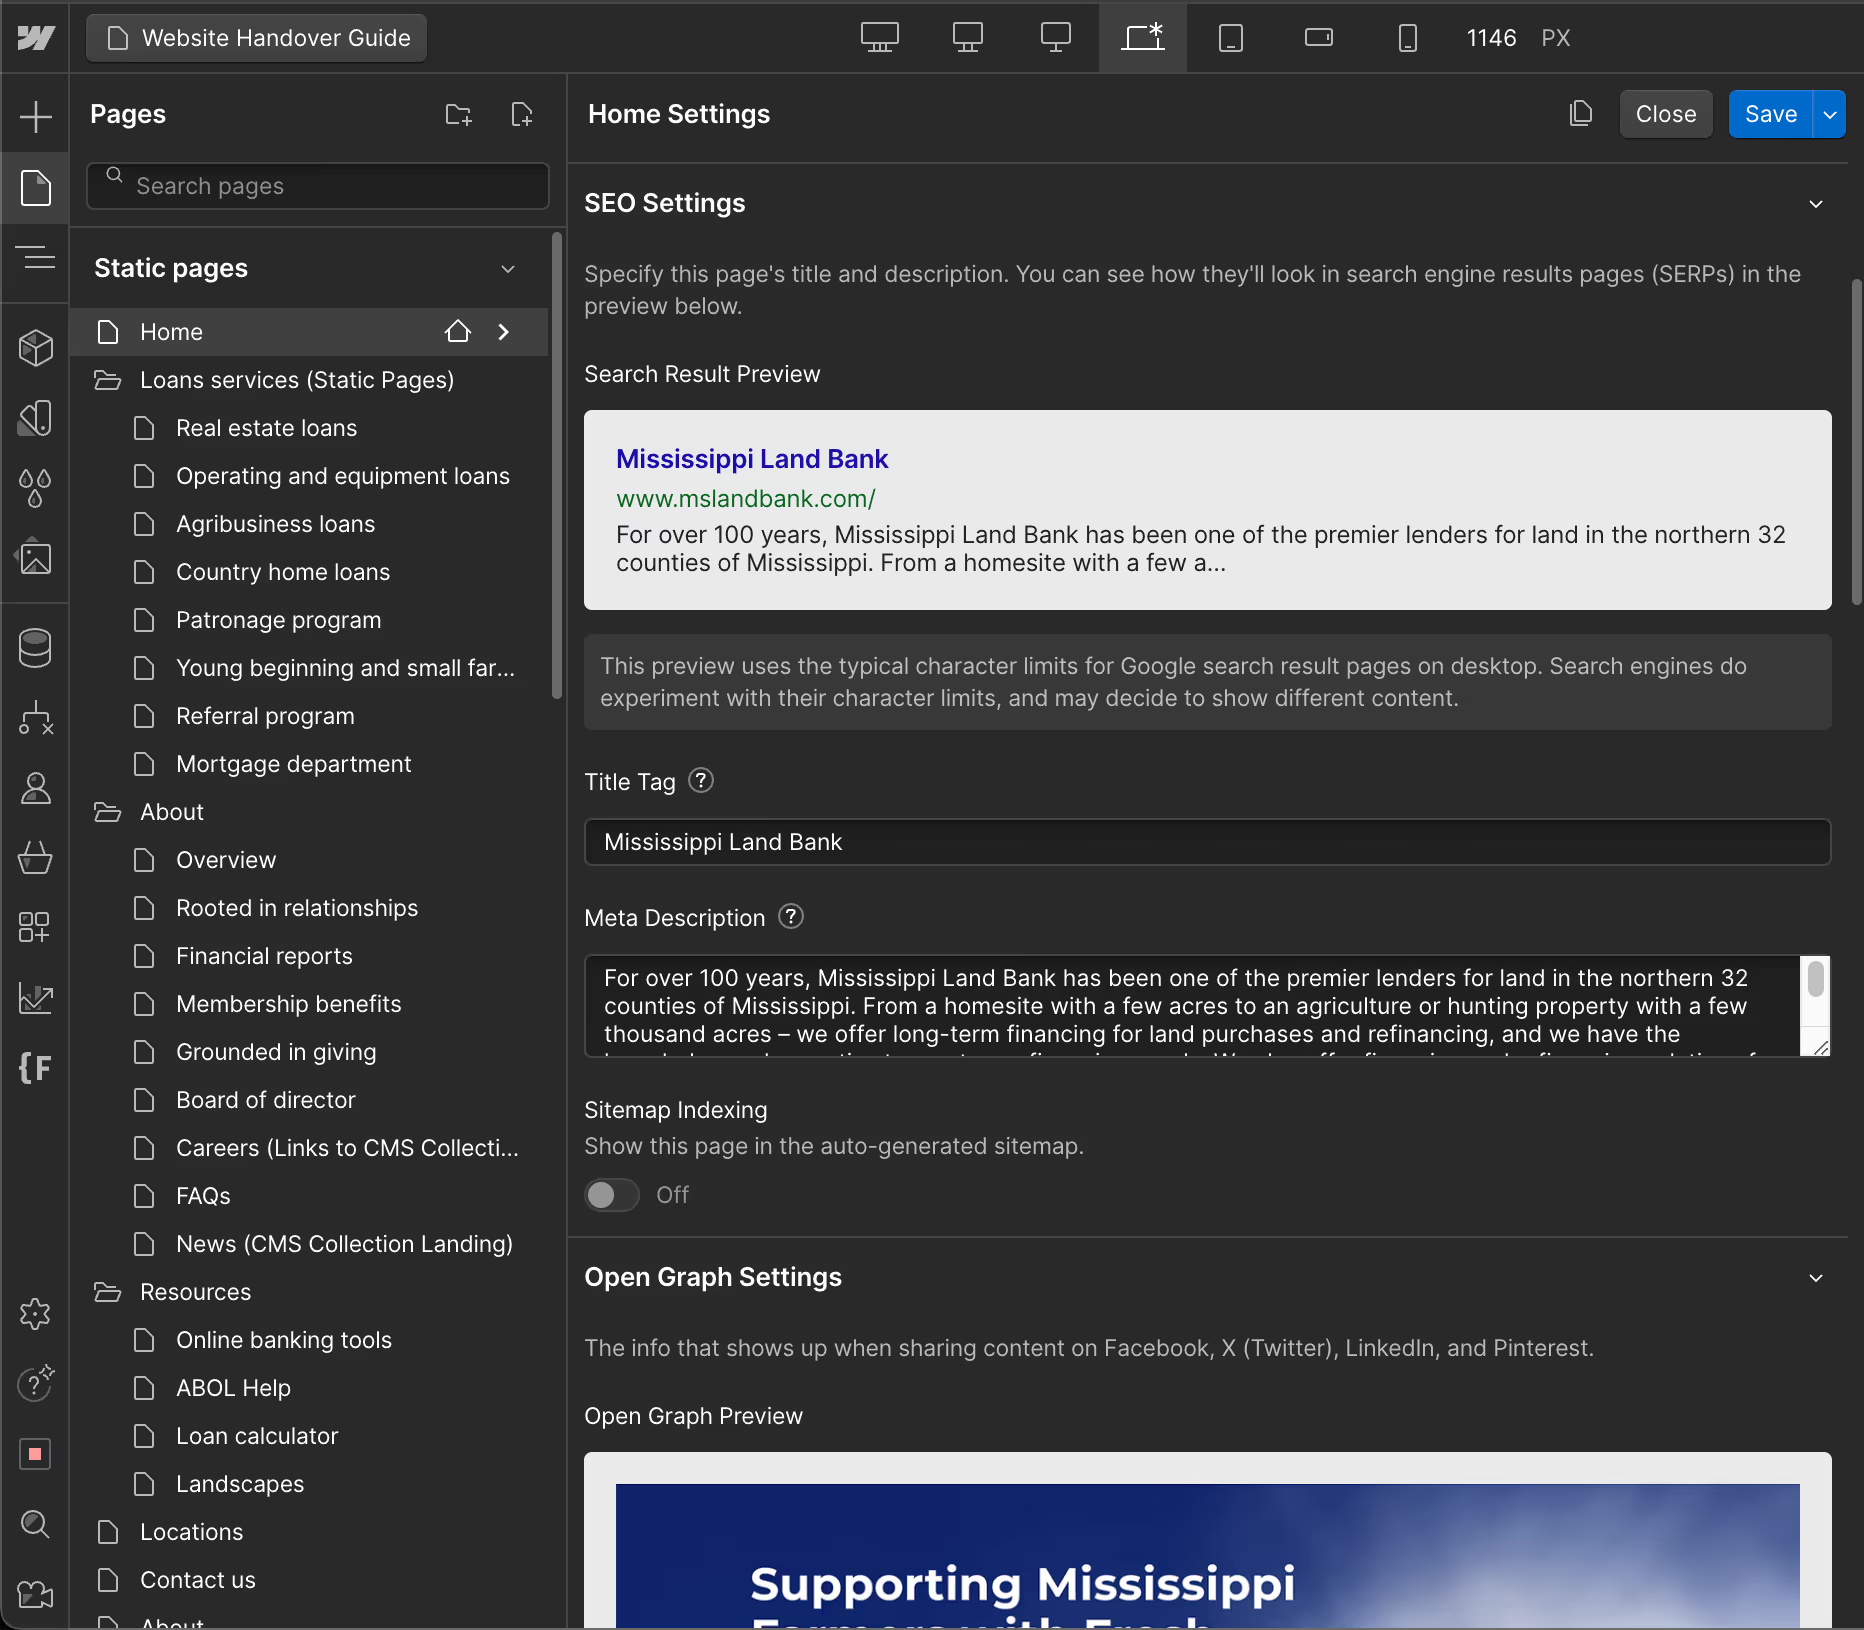
To ensure your website stays optimized for search engines:
• Edit SEO meta tags by going to each page in the Pages panel, clicking on the settings icon, and updating the Meta Title and Meta Description fields.
• Open Graph Settings: Customize how your pages appear on social media by adjusting Open Graph settings in the same section.
Helpful Tutorial: SEO Settings in Webflow - Learn more about optimizing SEO for your site.
6. Publishing Changes
Once you’ve made updates:
1. Click the Publish button at the top right of the Editor.
2. Select Publish to Selected Domains to push the changes live.
This action will update the live site with your changes. Remember to review your updates in Preview Mode before publishing to ensure everything looks good.
Helpful Tutorial: Publishing a Webflow Site - Check this video for more details on publishing.
7. Site Backups and Version Control
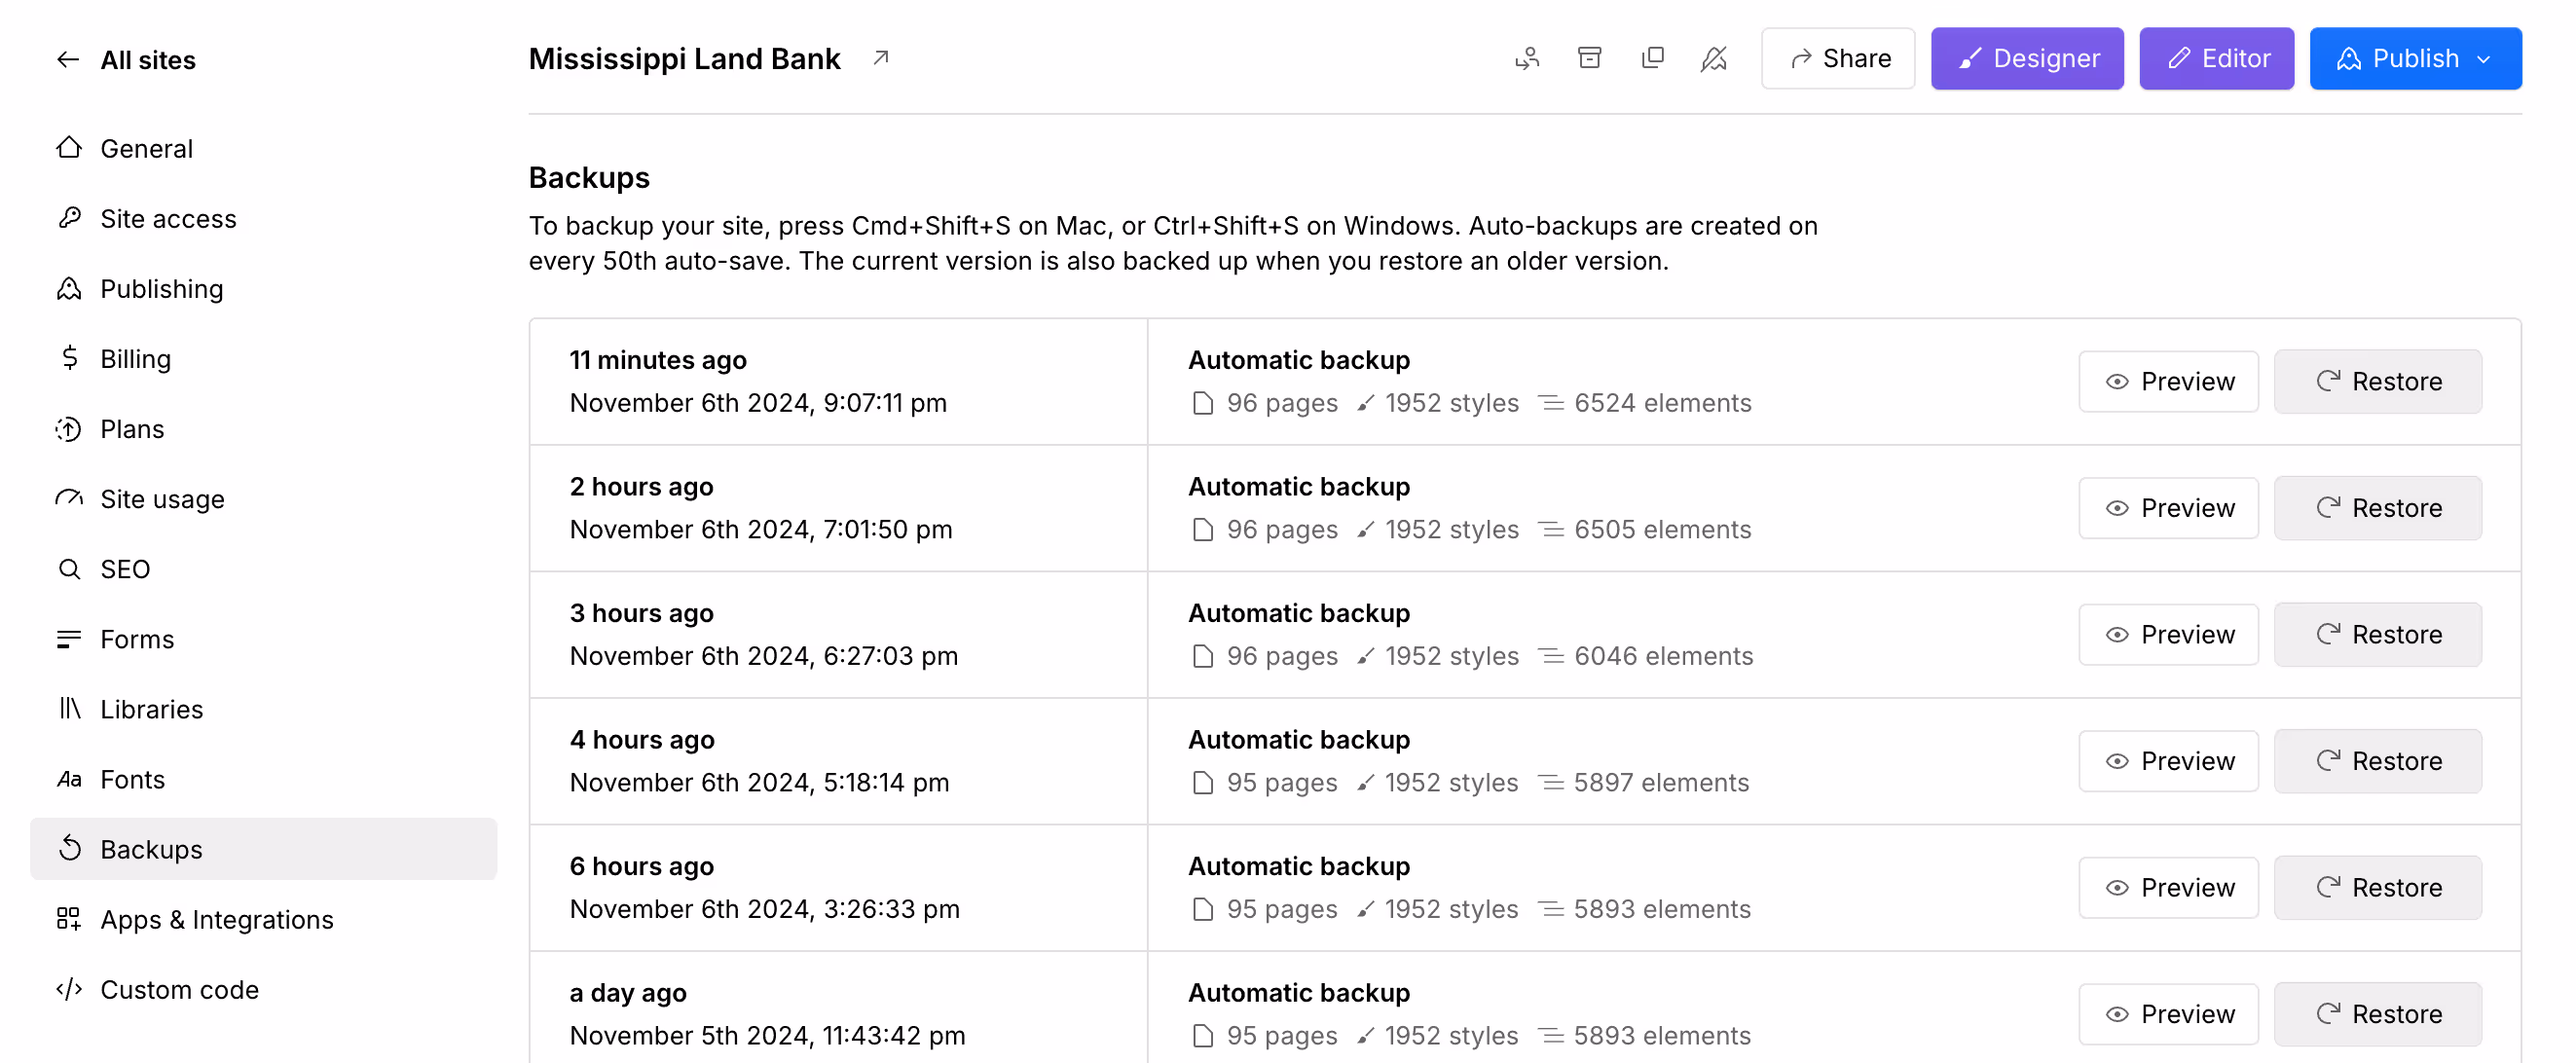
Webflow automatically saves versions of your website, so you can restore a previous version if needed:
• Go to Project Settings > Backups to view and restore past versions.
Helpful Tutorial: Backups in Webflow - This article explains how to manage backups and restore previous versions.
8. Custom Elements Specific to Your Site
Loan Calculator:
The loan calculator on your site is set up as a custom element. If any updates are needed, please reach out to your Webflow developer, as it may require custom code adjustments.
Developer Notes for Loan Calculator Code
This code represents a responsive loan calculator component designed for Webflow, using HTML, CSS, and JavaScript. Key functionalities and responsive styling are described below:
Structure & Layout
1. Container Setup:
• The main container (loan-calculator-container) is centered and has a maximum width of 800px for larger screens, with padding and rounded corners to enhance the UI.
2. Input Fields:
• Three input fields (loanAmount, interestRate, loanTerm) allow users to enter loan details.
• Input fields are arranged in flex containers (form-group-container) for a responsive layout, with space adjustments applied via padding and margin.
3. Button Styling:
• The “Calculate Payment” button has increased padding, a bold font, and fills the entire width on mobile screens (less than 768px).
• Custom class .calculate-button controls padding, font size, font weight, and color.
• Button styles are adapted for mobile with media queries to ensure full-width display.
4. Monthly Payment Display:
• monthlyPaymentContainer is initially hidden and only displayed after a successful calculation.
• This container is styled with a white background, padding, and a subtle box shadow for emphasis, particularly targeting readability for elderly users.
5. Amortization Table:
• The amortization section is hidden by default and becomes visible after calculations.
• The table header and body layout present a breakdown of monthly loan payments.
• An outer div with overflow-x: auto; makes the table horizontally scrollable on mobile devices for better usability.
6. Chart Section:
• Uses Chart.js to render a line chart showing the remaining loan balance over time.
• The chart container (chartContainer) is hidden initially and shown after calculations are completed.
JavaScript Functionality
1. Loan Calculation (calculateLoan):
• Calculates the monthly payment based on user inputs: loan amount, annual interest rate, and loan term.
• If the inputs are valid, the monthly payment is displayed, and the amortization schedule and chart are generated.
• If inputs are invalid, an error message prompts users to enter valid numbers.
2. Amortization Schedule (generateAmortization):
• Creates rows in the amortization table that break down each month’s principal, interest, total payment, and remaining balance.
• Appends each row to the table’s body to build a dynamic amortization schedule.
3. Chart Generation (generateChart):
• Generates a line chart with Chart.js, displaying the remaining loan balance over time.
• Any previous chart instance is destroyed before a new one is created, ensuring data is up-to-date.
Responsive Styles (Media Queries)
1. Mobile Adjustments:
• On screens smaller than 768px, the form fields stack vertically, and padding is adjusted for mobile-friendly spacing.
• The amortization table is set to width: auto within the scrollable wrapper, ensuring the table can be scrolled horizontally.
2. CSS Customizations:
• The .calculate-button has enhanced padding, font size, and weight for readability and emphasis.
• The button fills the entire width on mobile for better usability.
External Dependencies
• Chart.js:
• A CDN is used to import Chart.js, required for generating the line chart in the “Chart Section.”
This component is optimized for mobile and desktop, providing a clean and accessible loan calculator for users.
9. Helpful Resources for Further Learning
If you’d like to learn more about Webflow, here are some beginner-friendly resources:
• Webflow YouTube Playlist: A comprehensive playlist covering Webflow basics and advanced features.
• Webflow University: Webflow’s official documentation and tutorials.
These resources cover everything from editing basics to advanced customization and are easy to follow, even if you’re new to Webflow.
10. Need Help?
If you run into any issues or have questions, feel free to reach out with Michael from FetchCreates. The Webflow community and support team are also available to assist you with additional resources and guidance.
This guide should give you the confidence to manage and update your new Mississippi Land Bank website effectively. Enjoy exploring your new site, and don’t hesitate to reference the linked resources for more in-depth help!